
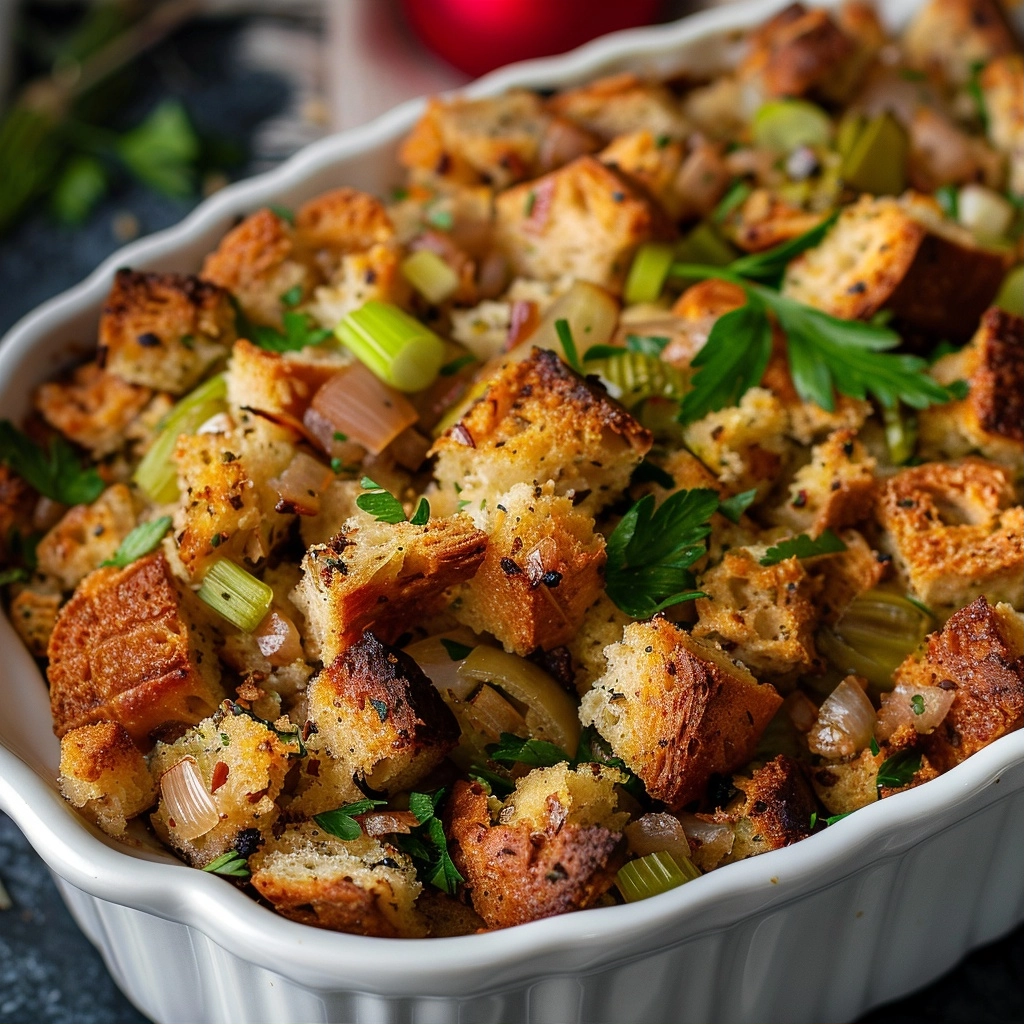
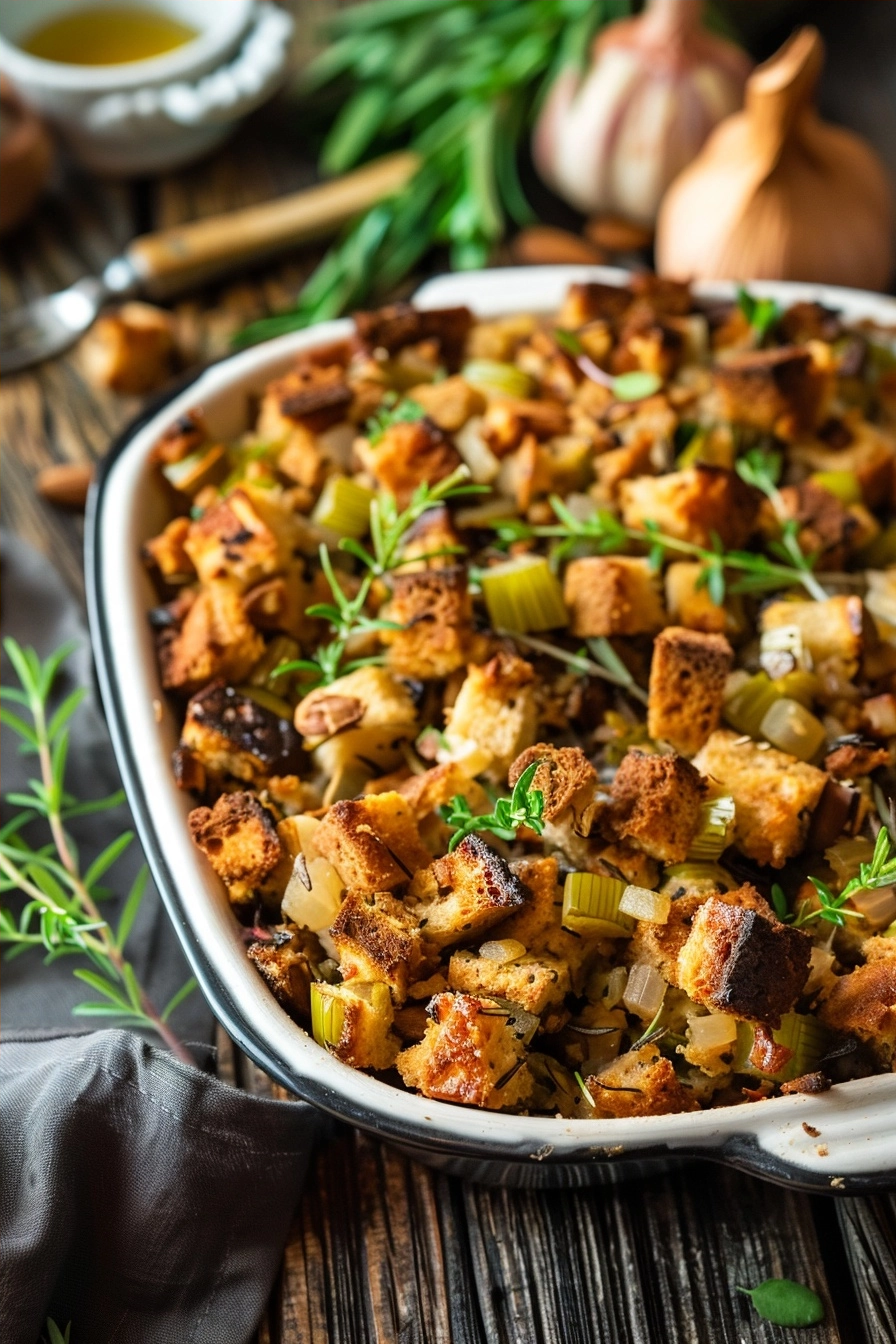
Grandma’s traditional thanksgiving stuffing recipe is a classic, herb-forward side dish featuring toasted bread cubes, aromatic vegetables, and savory vegetable broth. This time-honored preparation relies on simple, high-quality ingredients to create a golden, crispy top and a moist, flavorful center that anchors any holiday table.
| Prep Time | Cook Time | Total Time | Servings | Difficulty | Cuisine |
|---|---|---|---|---|---|
| 20 mins | 45 mins | 65 mins | 8-10 | Easy | American |
Why This Recipe Works
This recipe works because it captures the nostalgic essence of heritage cooking without relying on complex techniques. By utilizing day-old bread, the stuffing achieves a robust texture that holds its structure while absorbing savory moisture from the herbs and broth.
My experience confirms that toasted bread cubes prevent the stuffing from becoming a gummy mess. The combination of fresh celery, yellow onions, and poultry seasoning provides a deep, authentic flavor profile that pairs perfectly with roasted proteins or vegetarian holiday mains.
Ingredients
| Ingredient | Quantity | Notes |
|---|---|---|
| White or Sourdough Bread | 1 pound | Cut into 1-inch cubes and dried |
| Unsalted Butter | 1/2 cup | Use high-quality European style |
| Yellow Onion | 1 large | Finely diced |
| Celery Ribs | 3 stalks | Sliced thinly |
| Fresh Sage | 1 tablespoon | Finely chopped |
| Fresh Thyme | 1 tablespoon | Leaves picked |
| Vegetable Broth | 2 cups | Adjust for desired moisture |
| Salt and Pepper | To taste | Sea salt preferred |
Step-by-Step Instructions
Preparation and Toasting
- Preheat your oven to 350°F to ensure an even bake.
- Spread bread cubes on a large baking sheet in a single layer.
- Toast the bread for 15 minutes until light golden and dry to the touch.
Sautéing Aromatics
- Melt the butter in a large skillet over medium heat.
- Add the diced onions and celery to the skillet.
- Sauté the vegetables until they become soft and translucent.
- Stir in the fresh herbs and cook for one additional minute.
Assembly and Baking
- Combine the toasted bread and vegetable mixture in a large mixing bowl.
- Pour the vegetable broth over the mixture gradually while tossing gently.
- Transfer the mixture to a buttered 9×13 baking dish.
- Bake uncovered for 30 minutes until the top is crispy and golden.
Chef Tips for Perfect Results
- Use bread that is at least two days old to ensure it absorbs liquid without turning to mush.
- Brown the butter slightly before adding vegetables to introduce a nutty, complex flavor base.
- Whisk the broth and herbs thoroughly to ensure every bread cube receives even seasoning.
- Cover the dish with foil for the first 15 minutes if you prefer a softer, moister interior.
- Finish under the broiler for 60 seconds if you want extra crunch on the crust.
Common Mistakes to Avoid
Over-soaking the bread causes a dense, soggy texture that lacks structural integrity. Use just enough broth to make the cubes feel like a damp sponge rather than a soaked cloth.
Adding fresh vegetables directly to the bread without sautéing results in raw, crunchy bits of onion inside the soft stuffing. Always sweat your aromatics in butter first to extract their natural sweetness and depth.
Variations and Substitutions
| Ingredient | Substitution | Impact on Flavor |
|---|---|---|
| White Bread | Cornbread | Adds a subtle sweetness and denser crumb |
| Vegetable Broth | Mushroom Broth | Deepens the earthiness and umami profile |
| Sage | Dried Rosemary | Introduces a piney, more intense herb note |
Serving Suggestions and Pairings
Serve this stuffing alongside roasted root vegetables or a hearty nut roast for a balanced meal. It also functions well as a filling for stuffed acorn squash during autumn dinners. Ensure you serve it immediately while the top remains crispy for the best texture contrast.
Storage and Reheating
| Method | Duration | Instructions |
|---|---|---|
| Refrigerator | 3-4 days | Store in an airtight glass container |
| Oven Reheat | 15 mins | Cover with foil at 350°F with a splash of broth |
Nutritional Information
Approximate values per serving based on 10 portions.
| Nutrient | Amount |
|---|---|
| Calories | 210 |
| Carbohydrates | 32g |
| Fat | 8g |
| Protein | 5g |
Frequently Asked Questions
Can I use gluten-free bread for this stuffing?
You can successfully use gluten-free bread provided it is sufficiently dry before you begin the recipe. Ensure the bread is cut into small cubes and toasted thoroughly to compensate for the different starch structure.
How do I know when the stuffing is fully cooked?
The stuffing is done when the internal temperature reaches 165°F and the top layer of bread cubes is golden brown. You should also notice the liquid has been fully absorbed by the bread.
Why is my stuffing dry?
Dry stuffing typically results from insufficient broth or over-toasting the bread cubes at the beginning of the process. Fix this by drizzling an extra half-cup of warm broth over the top and covering the dish for an additional five minutes.
Can I prepare this recipe one day in advance?
You can prepare the vegetable and bread mixture a day ahead, but keep them separate until the day of baking. Combining them too early will cause the bread to lose its shape and texture in the refrigerator.
How do I keep the top from burning?
Use a piece of aluminum foil to tent the baking dish if you notice the top browning faster than the center is cooking. Remove the foil during the last ten minutes of the baking time to regain that desired crispy finish.
Grandma’s traditional thanksgiving stuffing recipe provides the reliable comfort required for a successful holiday meal. By mastering the balance of toasted bread and fragrant herbs, you create a side dish that elevates any celebration. Enjoy the crispy, savory bite of this timeless classic at your next gathering.
Print
Grandma’s Traditional Thanksgiving Stuffing
- Total Time: 65
- Yield: 8-10 servings 1x
- Diet: Vegetarian
Description
Grandma’s traditional Thanksgiving stuffing is a beloved, herb-forward side dish that brings nostalgic comfort to the holiday table. This classic preparation relies on day-old bread cubes toasted to perfection, combined with a savory medley of sautéed onions, crisp celery, and fragrant fresh sage and thyme. Baked until the top is golden and crunchy while remaining moist and tender inside, it is the perfect accompaniment for any roasted main course. Simple, high-quality ingredients shine in this foolproof, crowd-pleasing recipe that anchors every holiday celebration.
Ingredients
1 pound white or sourdough bread, cut into 1-inch cubes and dried
1/2 cup unsalted butter
1 large yellow onion, finely diced
3 stalks celery, thinly sliced
1 tablespoon fresh sage, finely chopped
1 tablespoon fresh thyme leaves
2 cups vegetable broth
Salt and pepper to taste
Instructions
Preheat your oven to 350°F.
Spread bread cubes on a large baking sheet in a single layer and toast for 15 minutes until light golden.
Melt butter in a large skillet over medium heat.
Add onions and celery, sautéing until soft and translucent.
Stir in fresh herbs and cook for one additional minute.
Combine toasted bread and vegetable mixture in a large bowl.
Gradually pour vegetable broth over the mixture while tossing gently.
Transfer to a buttered 9×13 baking dish.
Bake uncovered for 30 minutes until the top is crispy and golden.
Notes
Ensure you use day-old bread to prevent a gummy texture. You can prepare the bread cubes in advance to save time. Add more broth if you prefer a moister stuffing. This dish is entirely vegetarian and alcohol-free.
- Prep Time: 20
- Cook Time: 45
- Category: Baking
- Method: Baking
- Cuisine: American
Nutrition
- Serving Size: 1 cup
- Calories: 220
- Sugar: 3g
- Sodium: 450mg
- Fat: 9g
- Saturated Fat: 5g
- Carbohydrates: 30g
- Fiber: 2g
- Protein: 5g
- Cholesterol: 20mg
1 thought on “Grandma’s Traditional Thanksgiving Stuffing Recipe”